In this tutorial I will show you how to port forward RDP to the Windows Client behind the firewall. Below is how the setup looks like. For those that are looking at using FMC / Cloud FMC to configure the port forwarding rule, the configuration is slightly different.
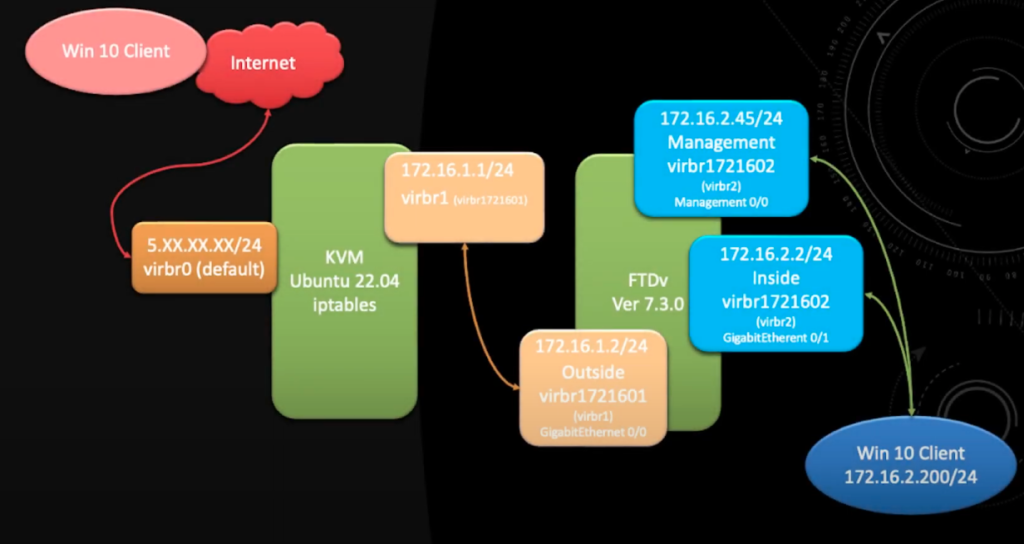
At the end of the setup you will be able to RDP into the Windows 10 Client (172.16.2.200) from the internet.
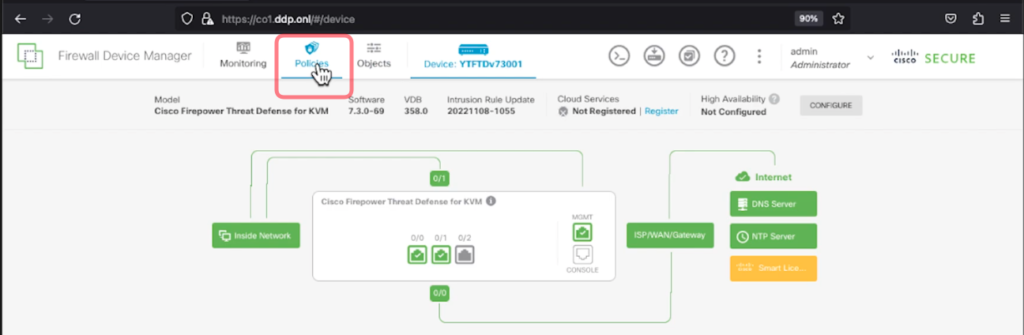
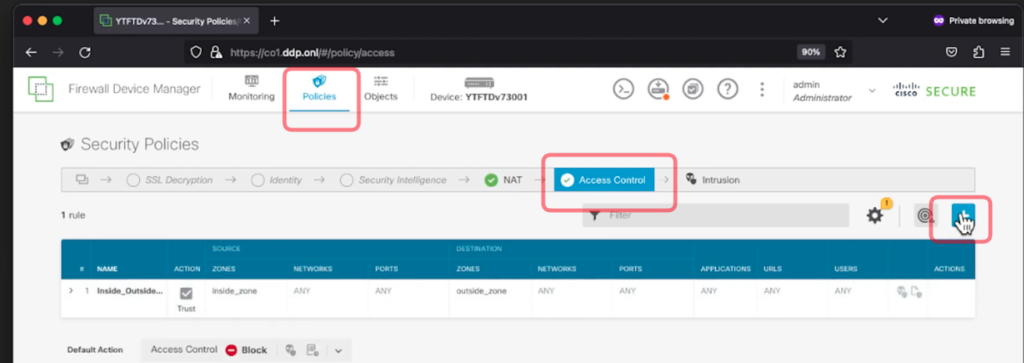
1. First go to Policies
2. Then go to NAT
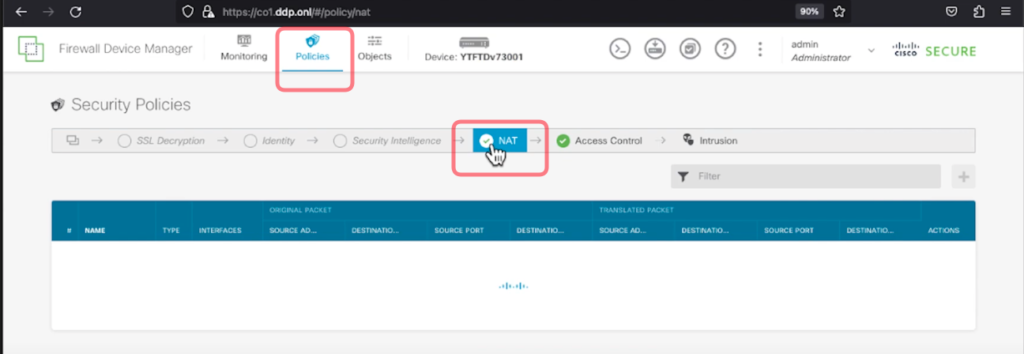
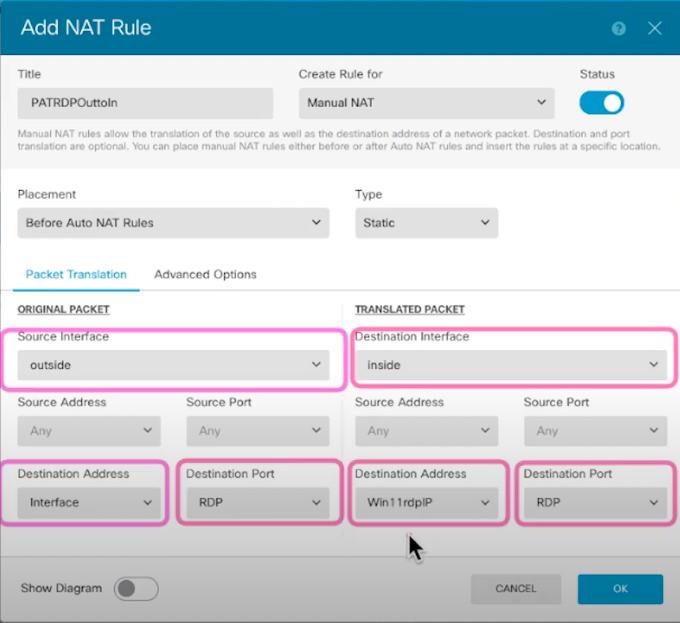
3. In FDM you can configure using the Source Address or Destination Address. In this example we are going to use the Destination Address in ORIGINAL PACKET Section.
ORIGINAL PACKET
- Source Interface: outside
- Destination Address: interface
- Destination Port: RDP (You will need to create an object for this with port 3389)
TRANSLATED PACKET
- Destination Interface: inside
- Destination Address: Win11RDP Client (You will need to create an object for this e.g 172.16.2.200)
- Destination Port: RDP (3389)
4. Once you have created the NAT Rule then you will need to configure the Access Control Policy to allow outside traffic to the inside Windows Client. Select the Access Control tab.
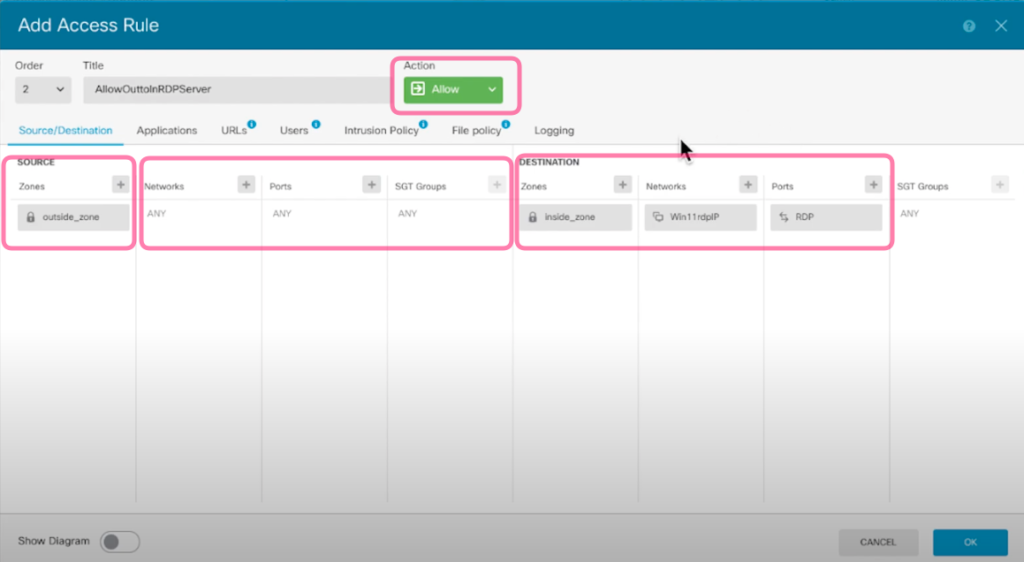
SOURCE
- Zones: outside_zone
- Networks: ANY (You can restrict the public IP address that are allowed to RDP to the Windows Client as well by adding the whitelist IP Addresses here.
- Ports: ANY
DESTINATION
- Zones: inside_zone
- Networks: Win11RDP Client (E.g 172.16.2.200)
- Ports: RDP
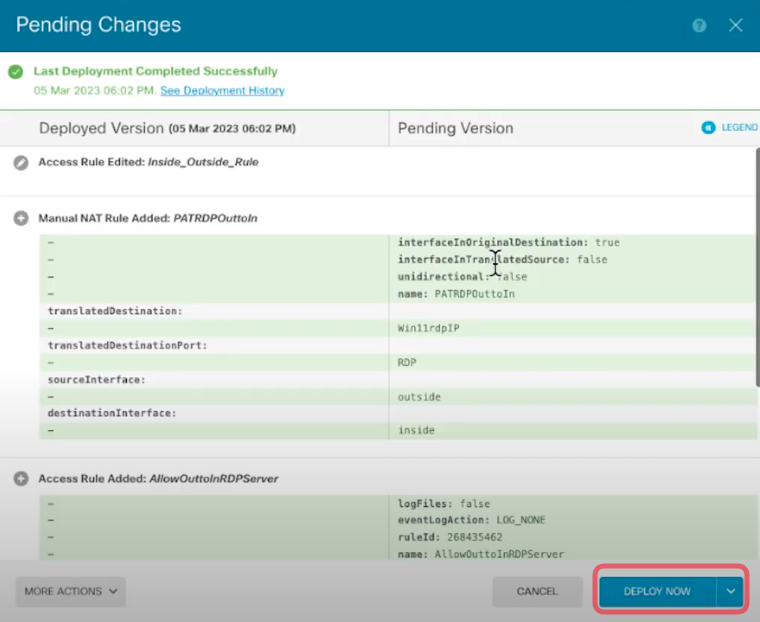
5. As usual remember to deploy the configuration. And you will to RDP to the Windows Client from the Internet.