
In this tutorial I will provide the step by step guide on how to activate Cisco ASAv Smart License.
A common error that happens for beginners when you are unable to reached the licensing server is that you have not configured DNS name server in the ASAv virtual appliance itself.
Below are the steps to configure DNS Name Server in ASAv.
Outside in the example refer to your Outside interface. (This also assume you have setup the outside interface properly and you are able to access the internet from your ASAv itself. I have configure the name-server in ASAv to use Umbrella DNS you can specific name server that you are using in your environment. Also do take note of the version that you are running on especially if you are doing it on older ASA version DNS resolution might not work and you will need to find another work around. The version I am running on for this is ASAv version 9.16.
| CiscoASA#conf t CiscoASA(config)# dns domain-lookup Outside |
If you are planning to activate using smart licensing I would recommend this basic configuration.
You should already have:
- A valid CCO ID to login to the https://software.cisco.com
- You should also have a Smart Account if not do create a Smart Account.
Once you have the above created you should be able to request for a ASAv trial license or link your ASAv license you have purchase.
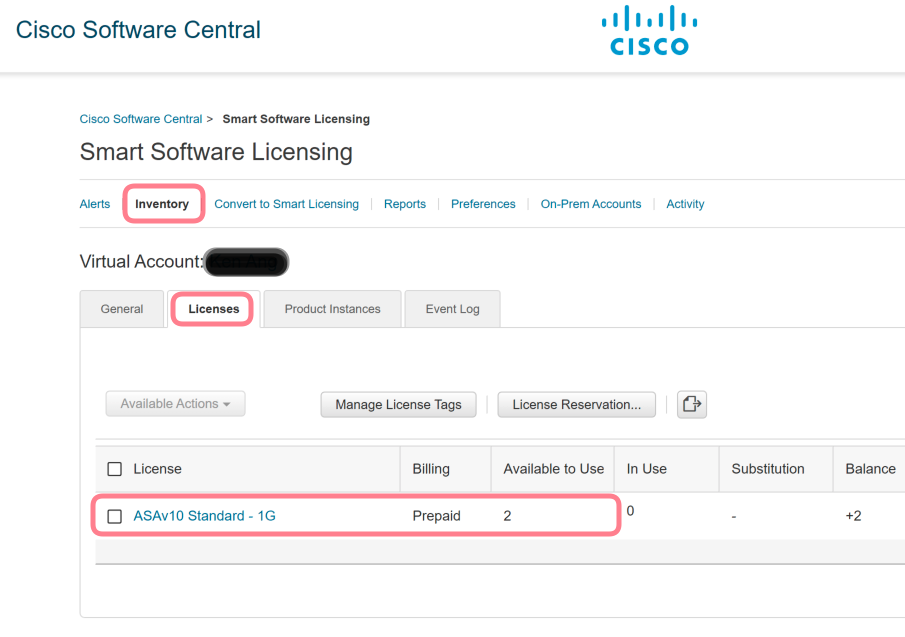
Now log in to the Software Central go to Smart Software Manager -> Manage Licenses.
1. You should see the licenses that you have here under you inventory
2. In the General tab, click on New Token

3. On the Create Registration Token enter the Description, Expire After and check on the Allow export-controlled functionality on the products registered with this token.

4. Copy the Token as you will need this for your ASAv Configuration later.

Now let’s move over to the ASAv Command Line.
(Optional) If you use a HTTP Proxy and does not allow direct internet access or resolution through standard DNS then you need to do the below configuration. If you don’t have HTTP proxy then ignore the below step.
| call-home http-proxy ip_address port port If your network uses an HTTP proxy for internet access, you must configure the proxy address for Smart Software Licensing. This proxy is also used for Smart Call Home in general. Example: ciscoasa(config)# call-home ciscoasa(cfg-call-home)# http-proxy 192.168.33.163 port 443 |
5. Enter the license smart configuration mode to start configuring the License entitlements
ciscoasa(config)# license smart ciscoasa(config-smart-lic)# |
6. Set the feature tier (throughput level {100M | 1G | 2G | 10G} This should correspond to the license you have.
ciscoasa(config-smart-lic)# throughput level 1G |
7. You might want to ping the dns name of tools.cisco.com to ensure that you are able to resolve the domain name.

6. Now you can issue the registration command license smart register idtoken <token id>
| ciscoasa# license smart register idtoken YjE3Njc5MzYtMGQzMi00OTA4 LWJhODItNzBhMGQ5NGRlYjUxLTE0MTQ5NDAy%0AODQzNzl8NXk2bzV3SDE0ZkgwQk dYRmZ1NTNCNGlvRnBHUFpjcm02WTB4TU4w%0Ac2Nnsfadasfad |
Below are a list of useful commands for troubleshooting Smart License activation.
• show license all
• show call-home profile all
• Show call-home smart statistics
• show crypto pki trustpoints
• show crypto pki certificate
• show run all | sec call-home
• show run | inc http
• show run | sec crypto
• show run | sec SLA-TrustPoint
• show tech license <<<<<< attach to TAC SR • ping [vrf abc] tools.cisco.com
• ping [vrf abc]
• telnet tools.cisco.com 443
• telnet tools.cisco.com 443 /vrf abc
• debug call-home smart-licensing all
• debug ip http client all
• debug ssl openssl [errors | ext | msg | states ]
• debug crypto pki […]