Do check out the article on how to deploy FTDv if you have not already done the deployment of FTDv in KVM.
In this tutorial we will go through the basic steps of configuring FTDv from the initial wizard setup in the console through telnet and also using FDM to preform the basic configuration to allow traffic from the Inside LAN to the Internet through Dynamic PAT.
- Configure the initial password and Management IP Address
- Connecting to the FDM through a browser
- Configure
1. Configure the initial password and Management IP Address.
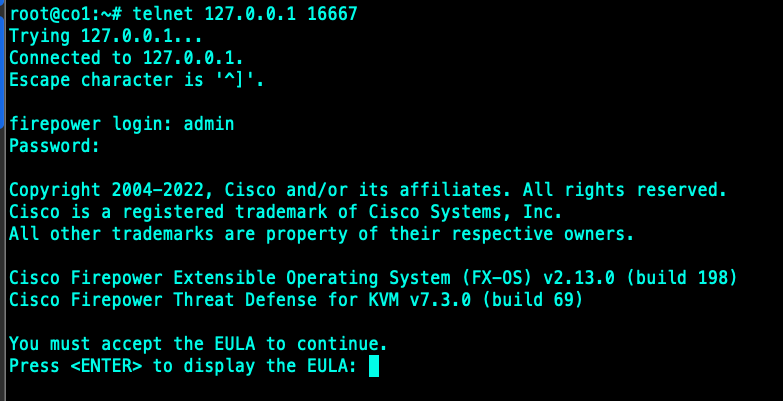
- In the Ubuntu KVM ssh session, telnet to the FTDv serial console.
- The default username and password is username: admin password: Admin123
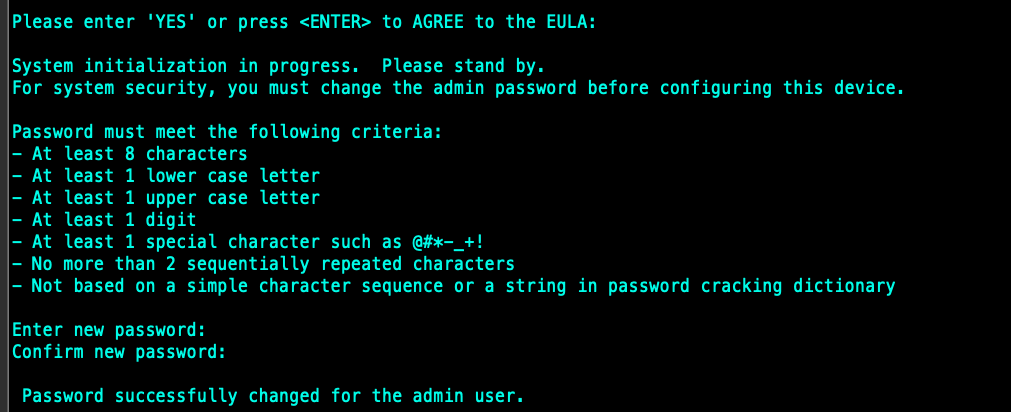
- When you first login to the FTDv, you will need to accept the EULA and enter a new password.
- Once you do that you will be prompted to configure the management IP. Configure the management IP address that you can connect to using any web browser in the same network.
- By default the option is to enter the ip address manually, You can also use DHCP to auto assign the ip address if you have a DHCP Server setup in that subnet.
- Enter a fully qualified hostname that you can use DNS to resolve (or just a unique name)
- You can use the default DNS Server, your own DNS Server or none.
- You will be prompted if you want to manage the device locally. Select yes.
- By default the FTDv is configured in firewall mode.

Next launch a browser and connect to the (Firewall Device Manager) FDM.
https://192.168.55.91 (Enter the ip address you have configured for your management interface. You can ignore the certificate warning and proceed to login.
In the FDM enter the username and password that you have set.
When you login to the FDM for the first time there will be a setup wizard to help you with the initial configurations.
The default Rules are to allow all outgoing traffic and block all other traffic.
For the outside interface the default option is to set to DHCP so you can get automatic IP assignment but you might want to manually set a allocated IP Address if you are planning to do any for of NAT/PAT from the upstream router/firewall. By default ipv6 is disable.
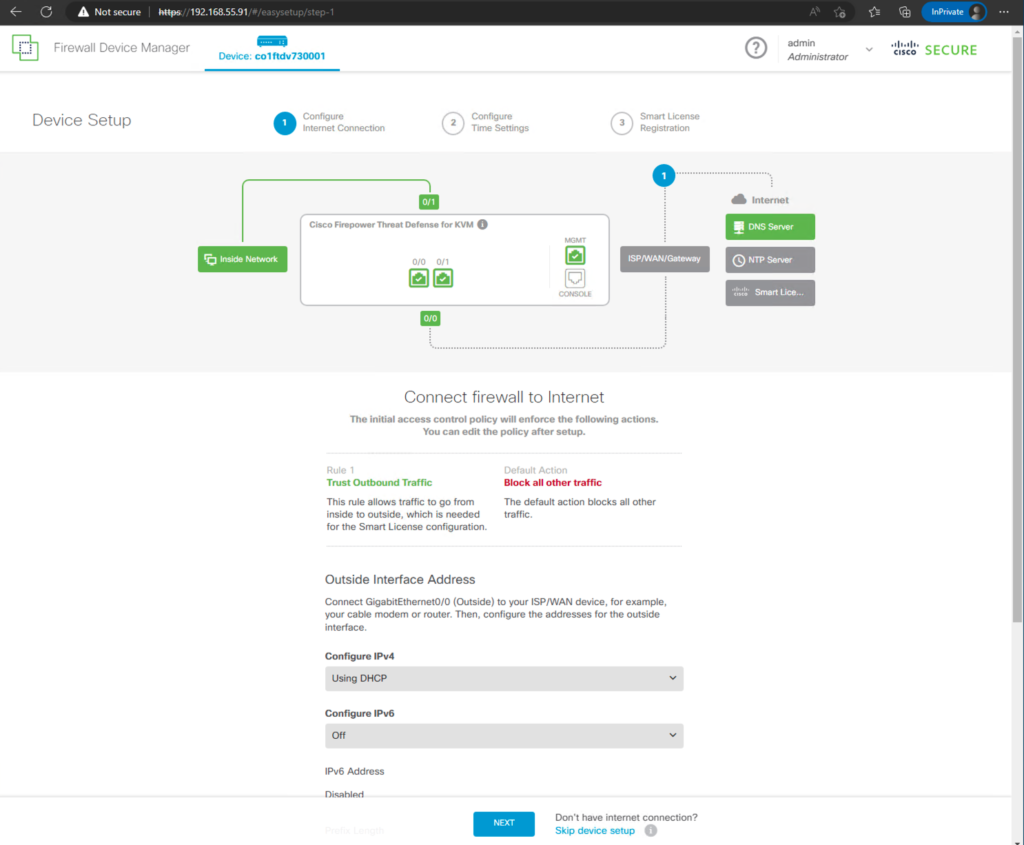
On the KVM side you should have configure the bridge for the outside interface which is connected to the internet. It is needed for the license registration. However you can come back do this later if it not already setup.
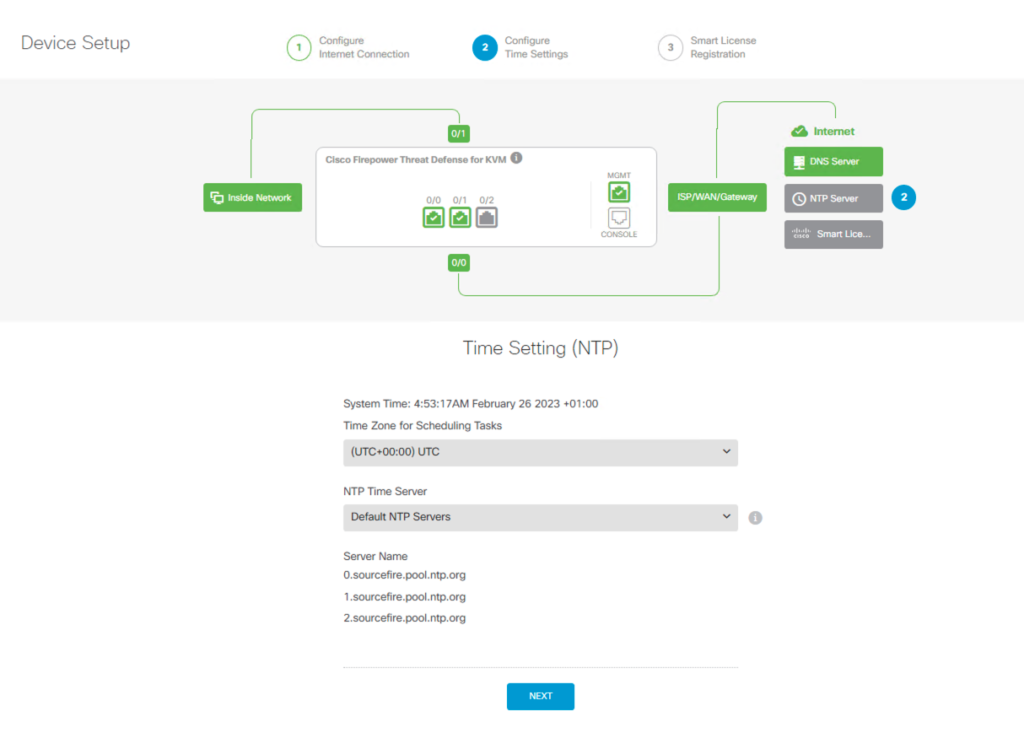
Next configure the Time Setting. Choose you timezone and the ntp server (you can use default for the ntp server)
Next you can choose to register the device with Smart Software Manager or start with the 90 days trial and then appy the license later. We will choose evaluation for this tutorial.You can start a eval first and activate the smart license later. Select the Performance Tier that you have purchased.
Select the Performance Tier base on what you have purchase or you are going to purchase. We are using FTDv10 for this tutorial which give us 1GB Rate Limit.
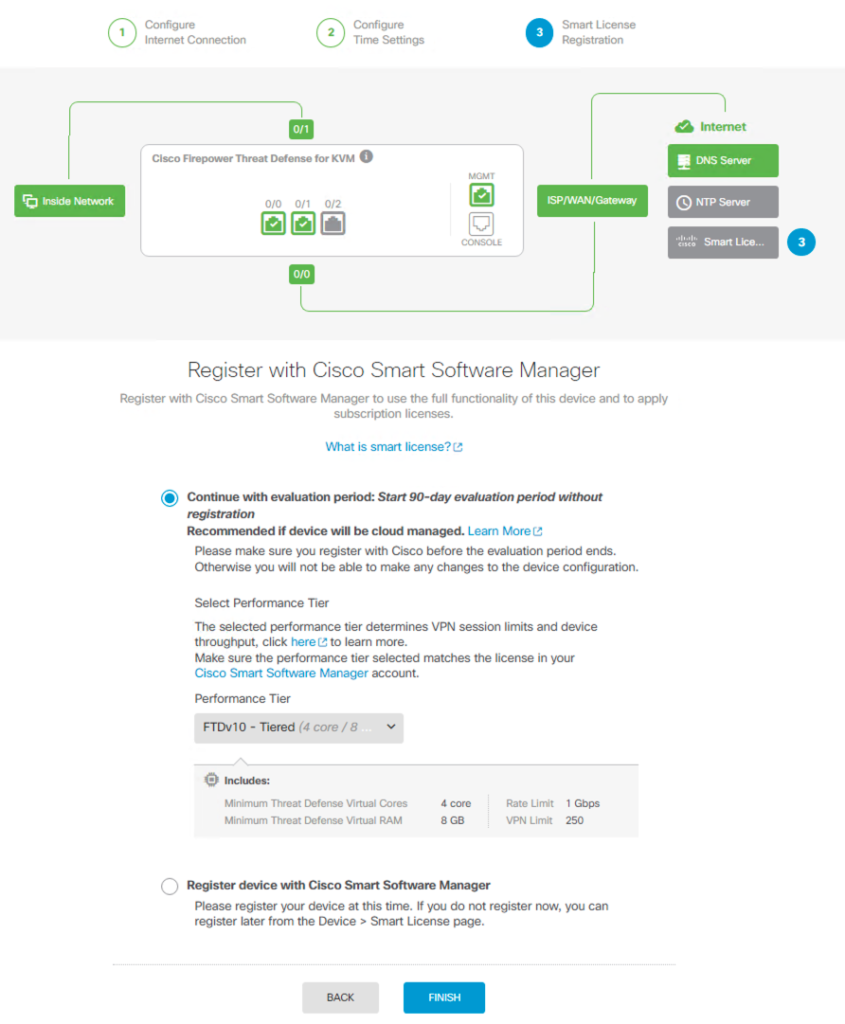
You will be prompted if you want to configure using CDO or Locally. Select local for this tutorial.
Once we complete the above steps we would have configure the FTDv that can access the internet through the outside interface.
Next we will configure the inside interface and test the connection from a client residing in the inside network.
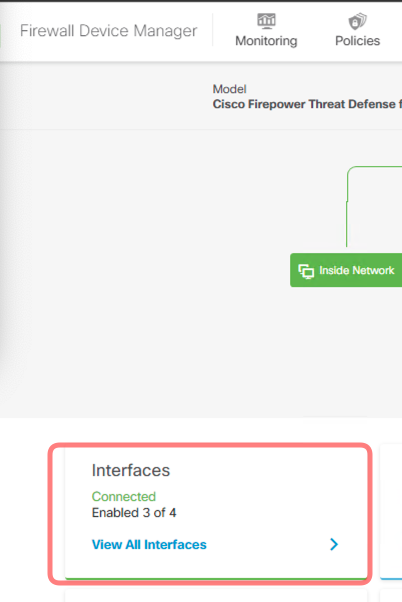
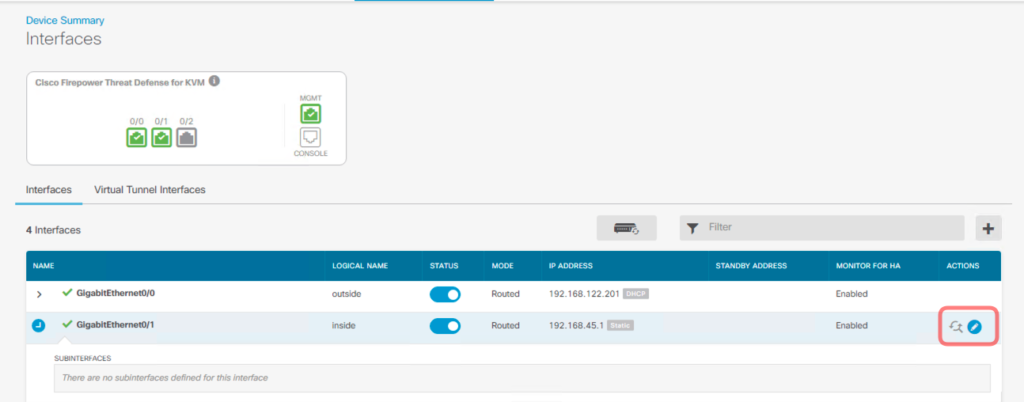
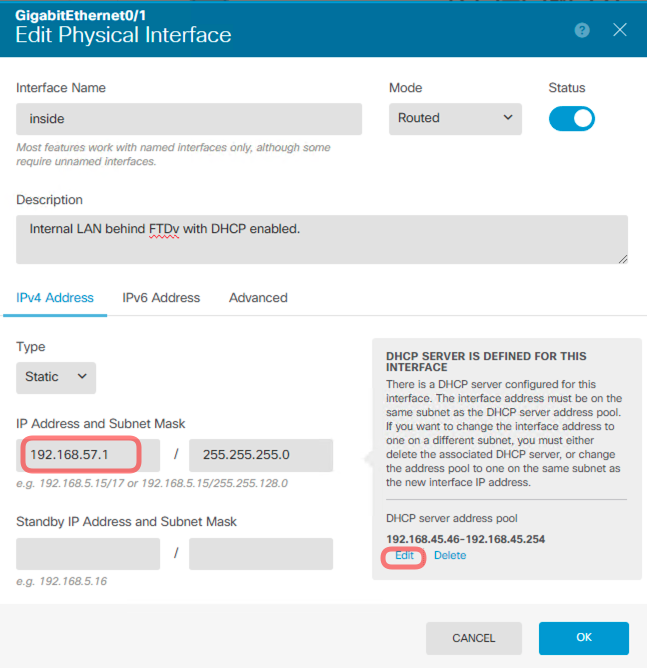
By default the inside interface (GigabitEtherenet 0/1) has a manually configure ip address of 192.168.45.1. Click on the edit button and you can change the ip address to your ip address and subnet.
Change the IP Address and Subnet Mask accordingly. The change the DHCP server pool address or if you do not want to use the DHCP Server function delete the address pool.
That is the basic steps to configure to allow the internal client in your LAN to access the Internet. By Default a Dynanic PAT and Access rule have been created during the Wizard setup to allow inside client to access the internet.

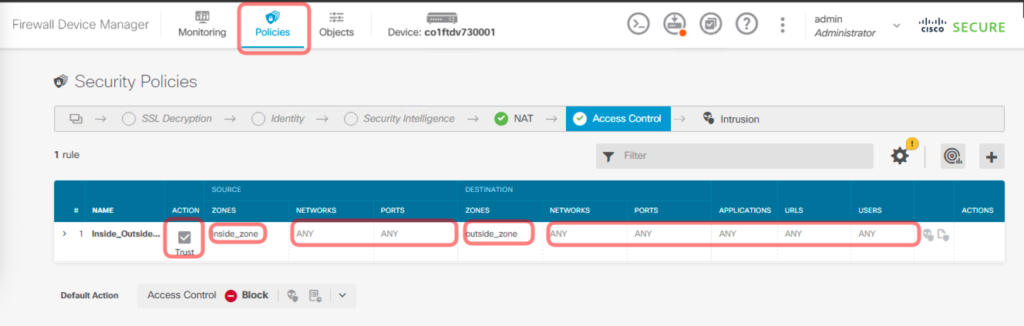
That is all for the basic setup of the FTDv using Firewall Device Manager (FDM)